
A long due post which was written back in February but never published!
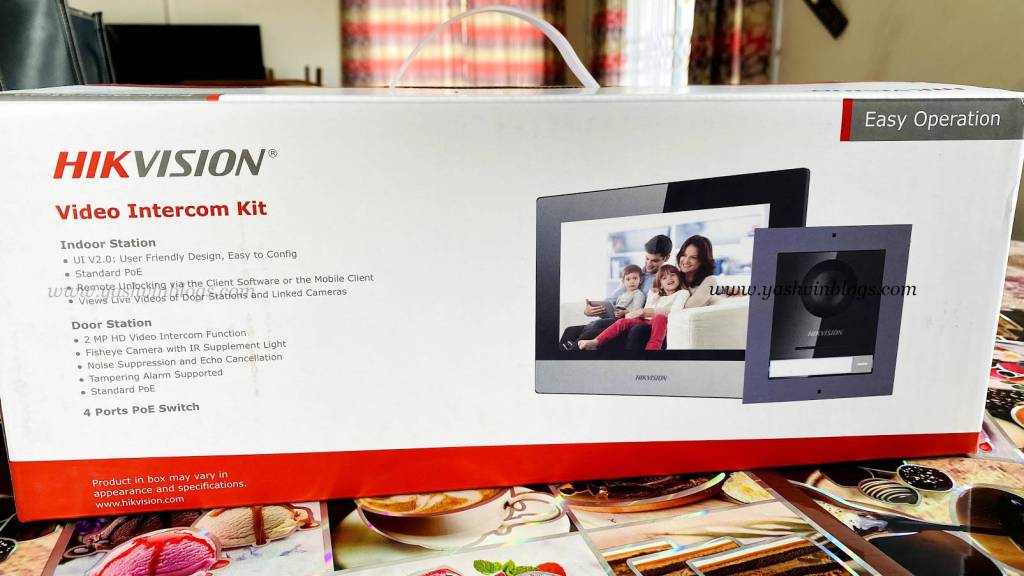
Several months back, I purchased a video intercom unit, more specifically, HIK Vision’s DS-KIS602. Being no security / surveillance expert, I nevertheless took up the challenge to set it up. It looked so straight-forward – connect network and power cables, power on. Click Next, next… Ta-da! Done!
Yes, it was really completed and connected. But I was not satisfied… I had to “break” it.
I ran into an issue whereby the outdoor unit was not detected by the indoor unit anymore. I spent some bunch of hours trying to fix this, after which I managed to put it back online again. However, there’s not much information about this fix online, hence, here is some knowledge sharing to anyone who might having the same problem.
This blog post might be a bit technical, specially at the end, so non-geeks might find it boring. You have been warned.
Brief introduction of the video intercom

The video intercom is a network based device (IP), comprising of the following in the kit:
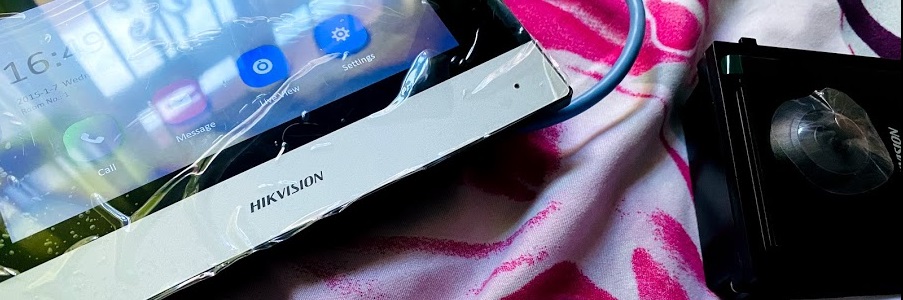
- a WIFI-enabled indoor station (which is basically looks like a tablet, fixed on a wall, preferably)
- an outdoor unit with a 2MP fisheye camera and a doorbell-like button
- a POE network switch, which on top of handling data transfers, it also supplies both above devices with power.
As compared to analog video intercom models and other devices from competitors, the main advantages of this IP based kit are

(1) Mobile notifications whenever someone rings the bell (or rather presses the button on the outdoor camera unit).
The indoor unit will ring (of course) and also, it will push a mobile notification to all devices signed on the same HIK Vision account. Hence, even if you are not at home, you can view who is at your door step and talk to them.
(2) Another benefit of this unit is that you can open your motorized door through the indoor unit, or remotely, through your app.
How to set up the intercom?
The normal installation procedures consist of
- Running a network cable from the POE switch to both indoor and outdoor units.
- Connect the power adapter to the POE switch and switch it on.
- Both units will boot and the indoor unit (tablet) will show an installation wizard.
- The wizard will allow basic customization along with registering the outdoor unit.
- The outdoor unit should automatically be shown on the screen, where you need to activate it.

Once the wizard is completed, you can test your video intercom and you are ready to use it.
How (not) to break things?
Now, if you are a geek or just simply a bit adventurous, you can customize the IP settings of both units so that they share the same network settings as your home router, instead of building a local network in between both units through the POE switch.
That’s where, things went berserk. When I enabled DHCP so that the outdoor unit gets a dynamic IP address within my home’s network, I got the following “Operation failed” error which disappears after a few seconds.

The device (outdoor station) also immediately disappears from the screen with a “No device found” message.

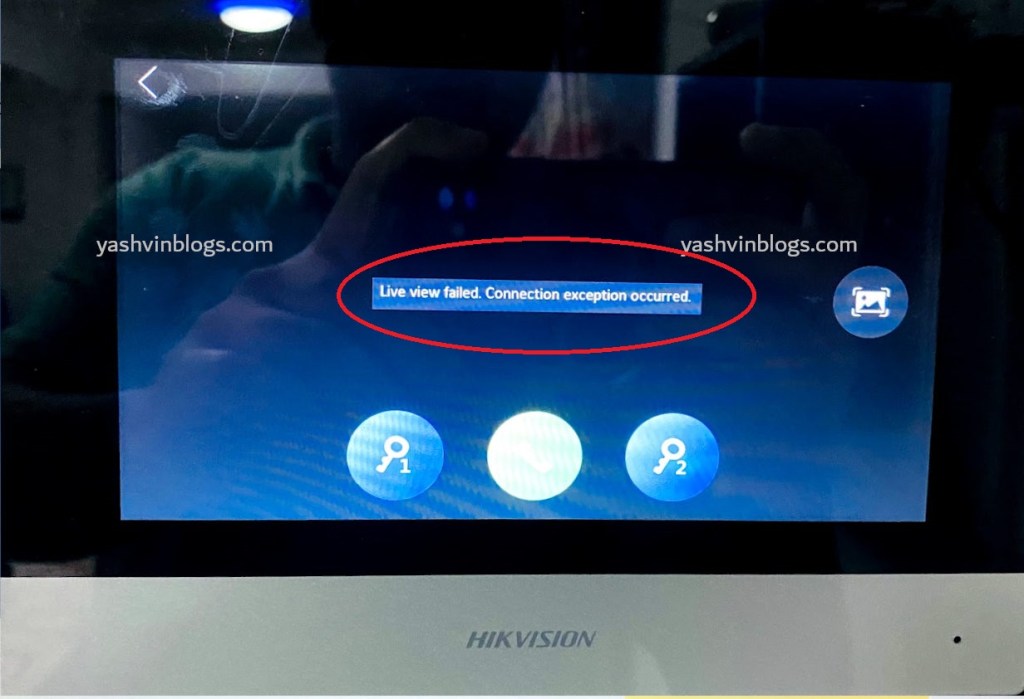
When you try viewing your outdoor camera on the indoor unit’s screen, you will get a ‘Live view failed. Connection exception occurred.‘ error message.
Similarly, if you press the door button on the outdoor unit, a voice will announce a “Call failed” warning.
Resetting everything?
At that moment, you probably say to yourself, let’s reset the intercom indoor and outdoor units to default settings. That’s when you discover that there is no reset button to push on the back of any of the devices. So, you can not reinitialize settings.
How to fix things?
As written earlier, I spent hours trying to make things work again. For example, I tried finding the ‘lost’ outdoor unit by manually configuring an IP address within my home network. I downloaded the recommended software to do the job : HIK Vision’s IVMS 4200, SADP and Batch Configuration. Despite reading tons of user manuals online and going through loads of videos, but still nothing. The external door unit looked dead and stayed invisible in the network.
The magical solution is to……
Step 1 : Connect a laptop directly to the POE switch
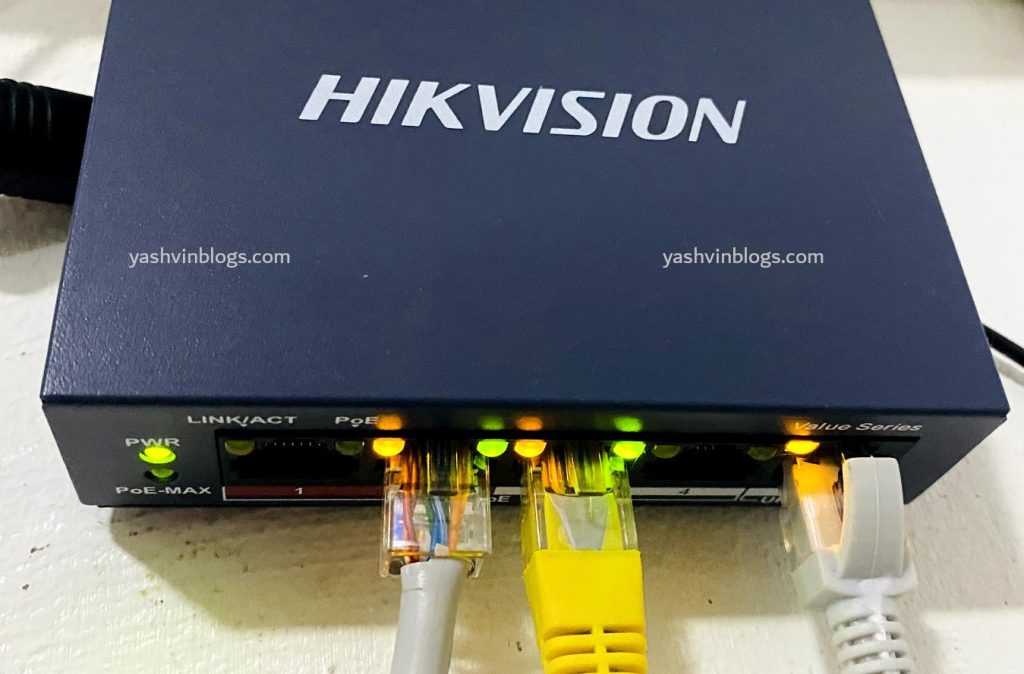
You can plug in a network cable from your laptop / computer into any of the free ports of the switch.
For example, in the picture above :
- Gray cable is the one running from the switch to the outdoor station at the gate
- Cable with yellow end is the one connecting the switch to the indoor station tablet
- White cable is the one connecting to the laptop
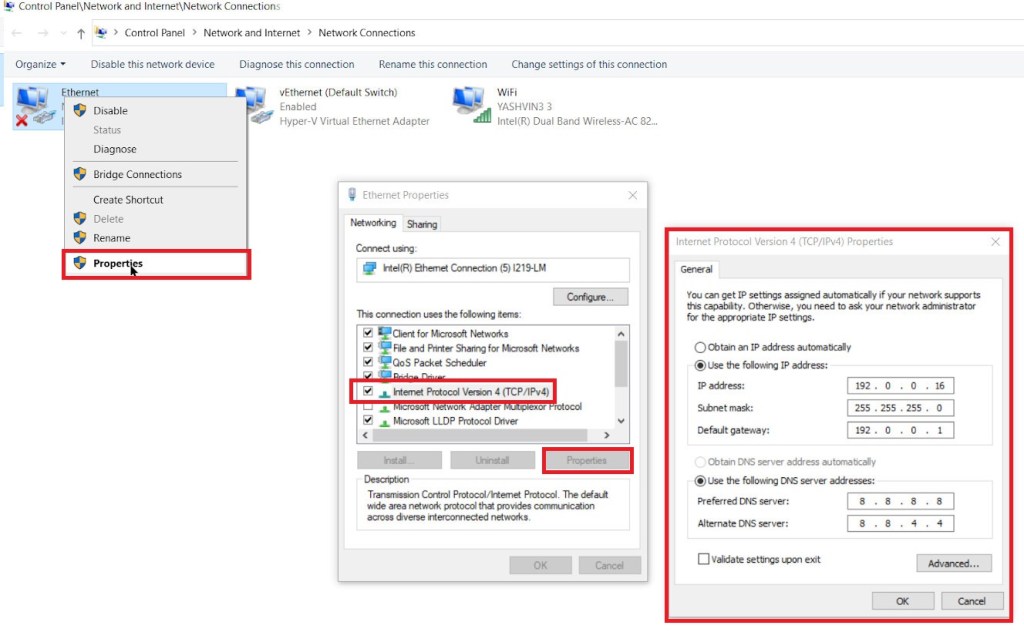
Step 2 : Change your laptop / computer internet adapter settings
This step is necessary to allow you to connect to the same network of the HIK Vision indoor station, outdoor station and the dedicated switch. Remember to clear the changes done below after the process as this will prevent you from joining any regular network you might connect to via a network cable.
Go to your network settings, choose your network adapter, go into the properties section, select “Internet Protocol Version 4” -> Properties. On the displayed screen, select the option to “Use the following IP address” and the “Use the following DNS server addresses”.
Step 3 : Run SADP or iVMS software
This step will allow us to grab hold of the devices which went rogue (with incorrect ip configurations). For this post, I will be using iVMS-4200 but do take note that you can also use Search Active Device Protocol (SADP) tool. Both software can be freely downloaded on the net.
Clicking on the “Online device button” will display two new lines as highlighted in red below
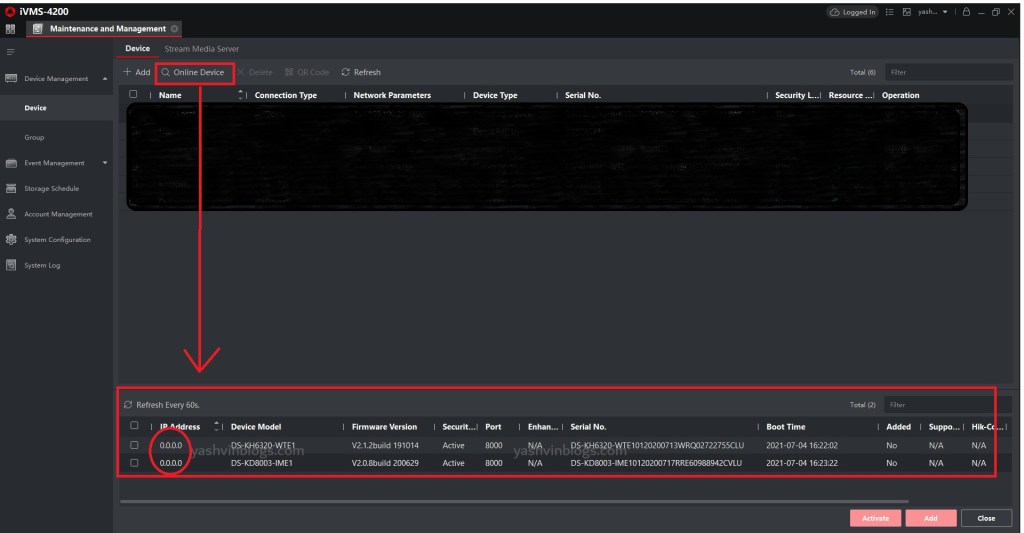
So, from the above screen, we can now “see” our devices but their IP addresses are all invalid, resulting from the failure when we were trying to be adventurous with the DHCP settings in the set up wizard.
Step 4 : Re-configure the “lost” devices
We now need to assign valid IP addresses to both the indoor and outdoor stations so that they are back onto the network.
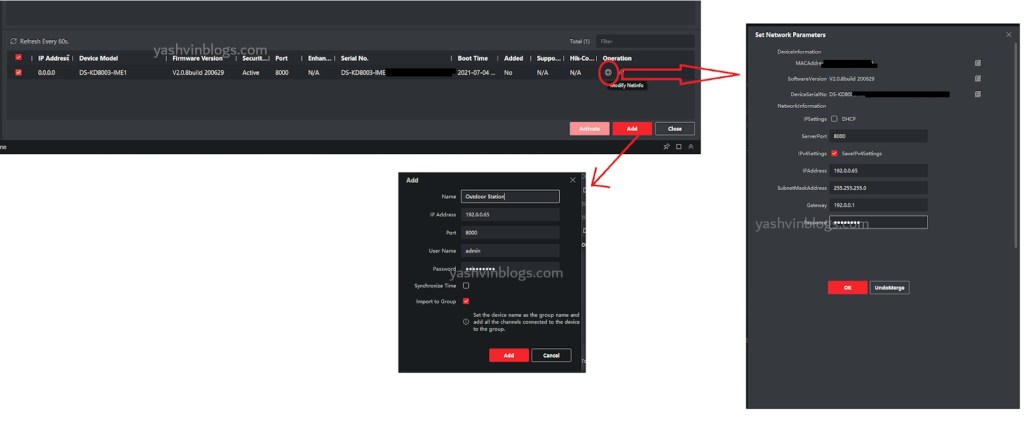
Click on the configuration icon of each device. This will bring up the screen on the right of the screenshot above.
Enter the following data:
IP Address :
192.0.0.65 (for the outdoor station – The device model will be something like DS-KD8003-IME) or
192.0.0.64 (for the indoor station – The device model will be DS-KH6320-WTE)
Subnet mask : 255.255.255.0
Gateway : 192.0.0.1
Password : This should be the password you configured in the setup wizard.
Click on the OK button and make sure to do the same process for both devices with 0.0.0.0 IP address
Once done, select the device again by clicking on the left hand side box and then click on the “Add” button. From the new screen displayed, name the device correctly and put the corresponding IP address and password again. A wrong password will add the device but it won’t be able to connect.
Once both devices are re-configured for the network and added to your dashboard, they will show up as being online.
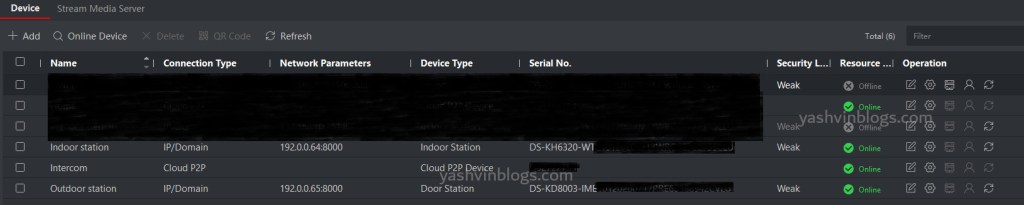
That’s it. The intercom should be back working again.
Remember to disconnect your network cable, revert back the temporary IP settings. The two local IP addresses on the dashboard will show offline (because you are no more on their local network via the switch) but your cloud account will still be online.
Last words
Now that you know how to put your outdoor unit online again, you should be confident enough to freely play with the IP settings without fearing to break things again. Despite this situation you might run in, the installation process does not really require a professional technician. You just need to know how to drill holes, run network cables from the router to the indoor and outdoor units.
The next challenge is to connect the outdoor intercom station to the gate motor. This will allow me to open the gate directly from the indoor station or via my HIK Vision mobile application. So, imagine your gardener coming to work. He presses the button in the outdoor intercom station. Despite you are not at home, you can open the door for him. That sounds awesome 😀
As for me, I love having fun doing these DIY stuffs, especially when it comes to electrical stuffs. Hope that this post turns out to be useful to anyone running into this issue.
Cheers!

Many thanks you are a saviour , could you please assist me how to connect outdoor with bell switch ? As people doesn’t press the switch available on outdoor unit which doesn’t give me notifications…
LikeLike