

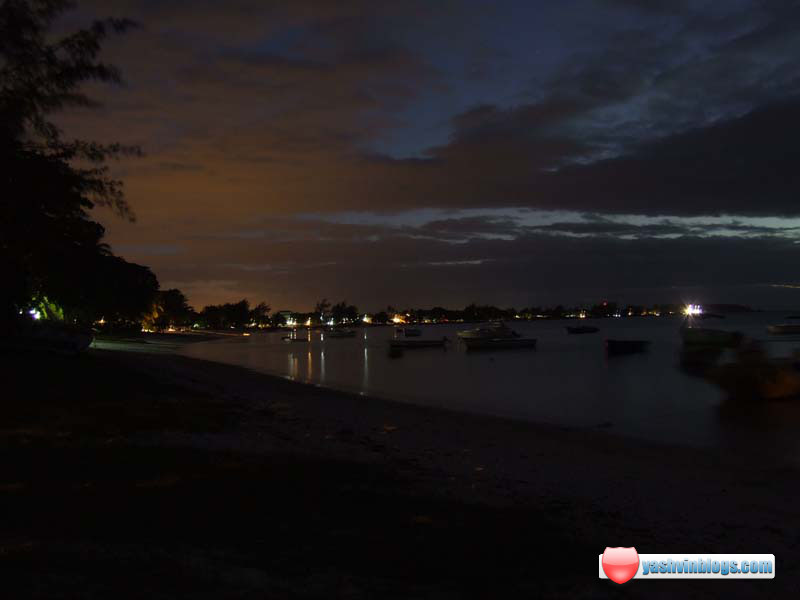
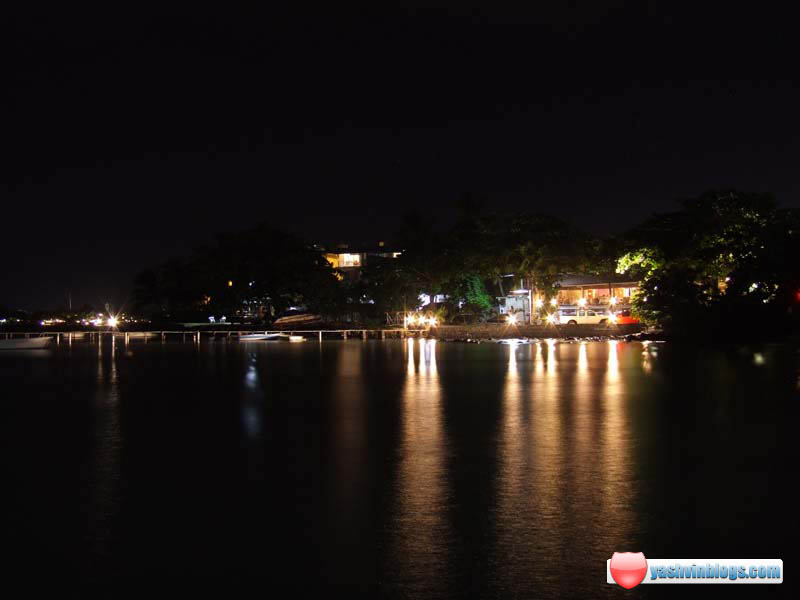
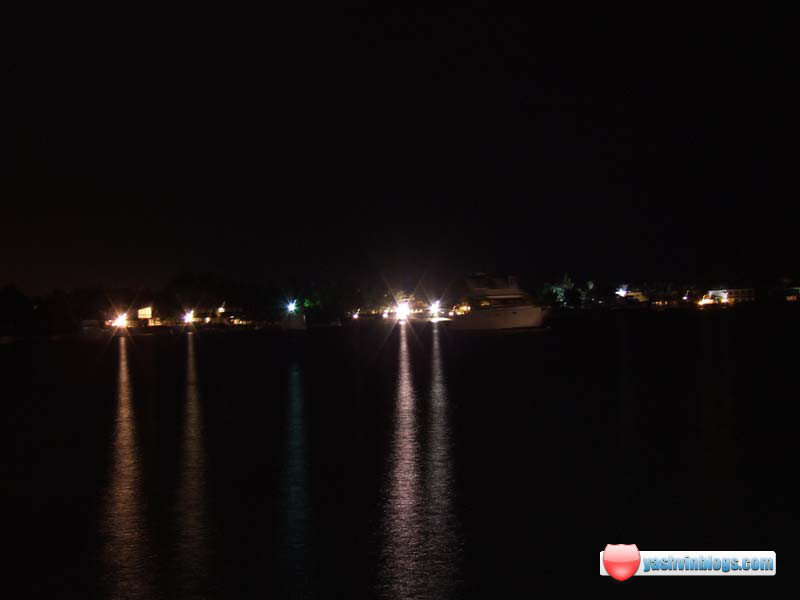
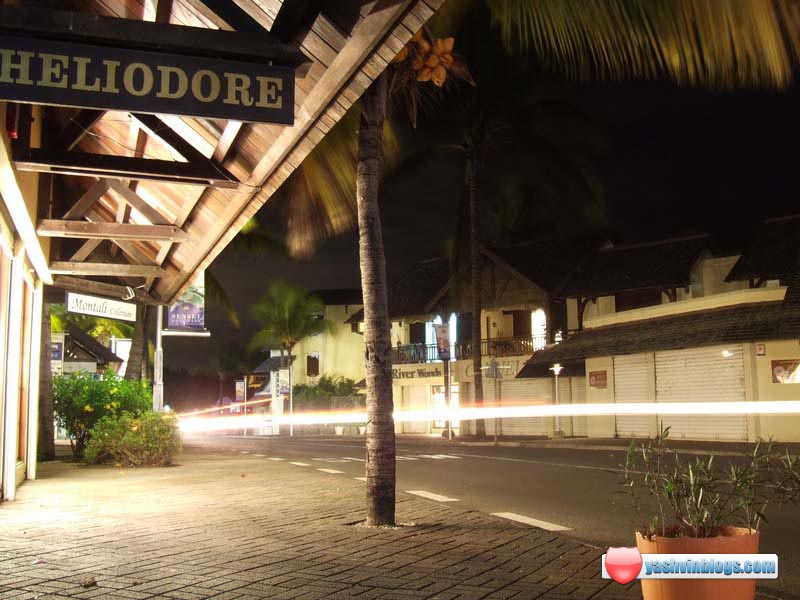
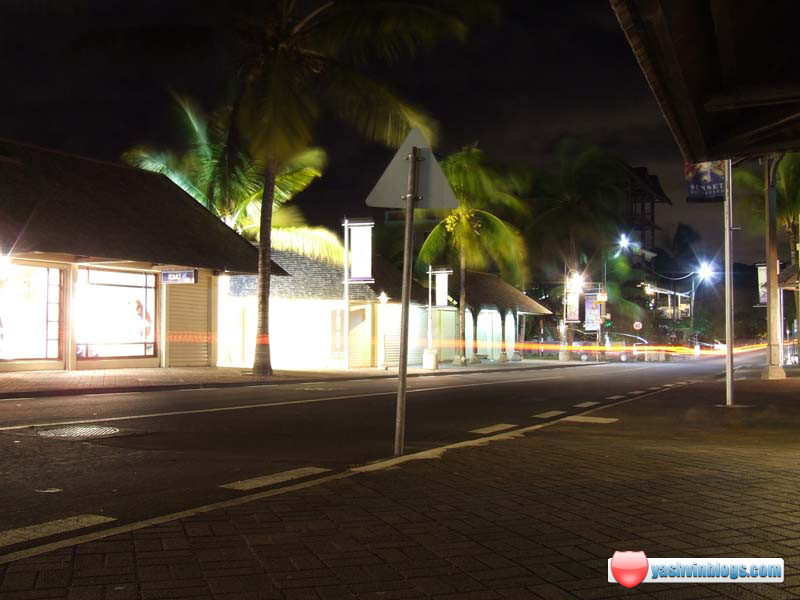
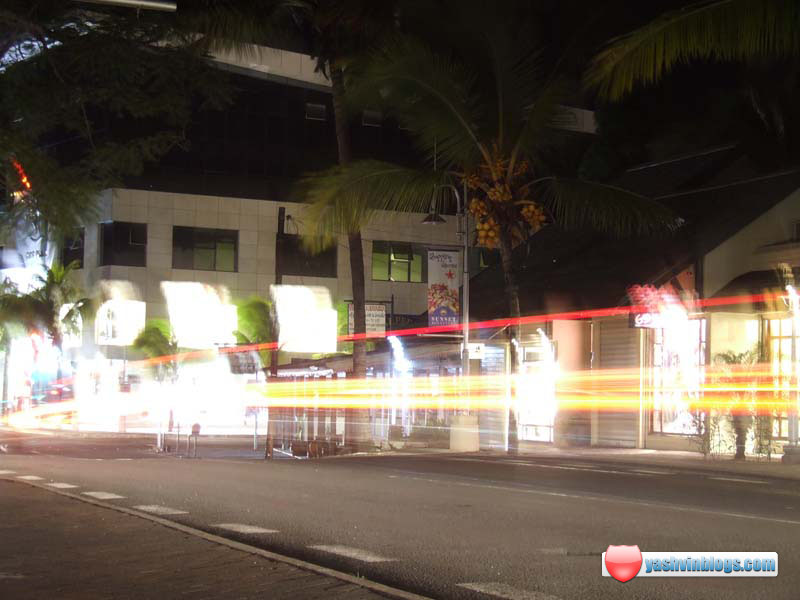
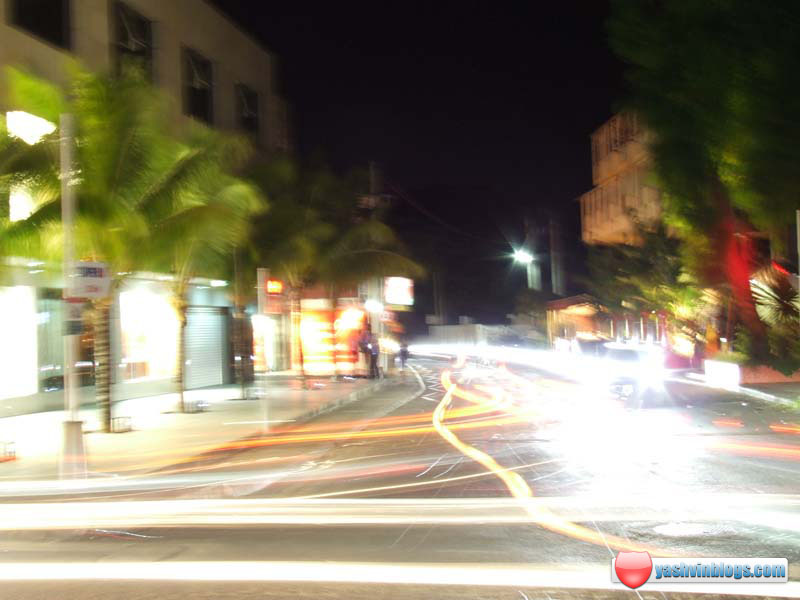
This evening, I set out for the coast from Trou aux Biches up to Grand Bay.
My objective : Try some night shots with the camera, together with the tripod.
My *nearly* 3 hour journey was nice, I learned a few things while experimenting and playing with the manual settings for aperture and shutter speed.
The gallery
So, here is a small gallery, my first one 🙂
Click on them to enlarge. (Lightbox mode enabled!)
btw, 2-3 of the pics seem to be of bad quality when I compressed them.
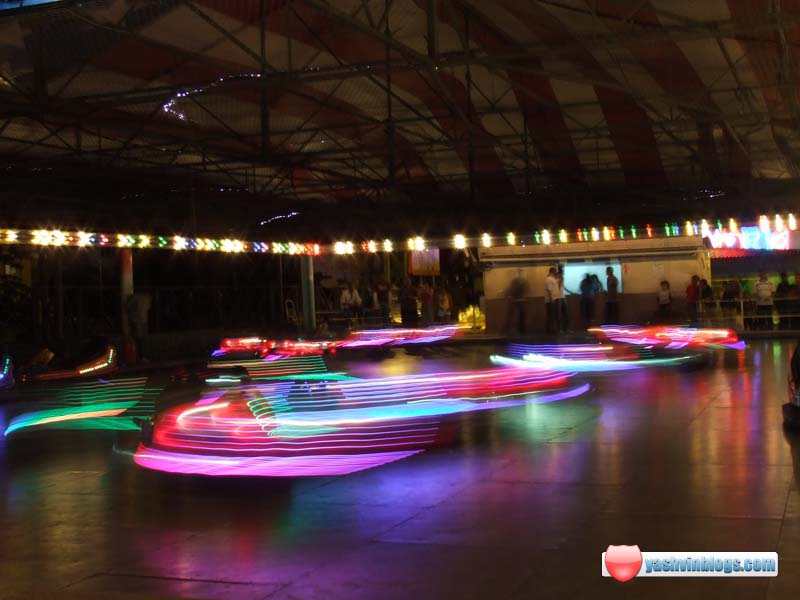

Auto tamponneuse / Bumper Car Video
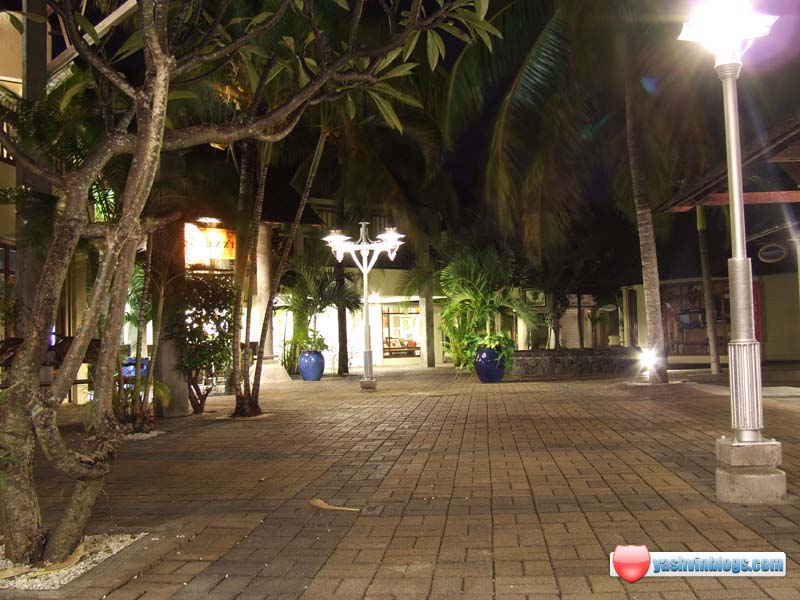
As you noticed, the last pictures were taken at Super U, Grand Bay.
Since I cannot get into one of those bumper cars, I have always enjoyed watching the younger and the elder kids driving around.
It seems to be so much fun 😦
Check out the bumper cars in action (1 minute video which I shot).
btw, Check out the latest post of Dhaneesha on Road Traffic Signs.
So, what do you say about my first set of pictures?

Great night pics. Maybe you should do a tutorial on how to do those light effects. 🙂
LikeLike
i agree with carrot.. i like those trailing lights! its like NEMESIS in HEROES! 😛 very nice!
LikeLike
Nice pics. maybe you could read more on Digital Photography stuff or subscribe to amateur digital photographers on Flickr.
LikeLike
i love the trailing light effects. great shots!
LikeLike
some beautiful shots, it’s great playing with the aperture settings, much nicer results than with a flash. You should try some shots of people’s faces in the dark with just candle light. You can have some amazing results. I have an example of a shot I took during Divali, in a dark room where people are lighting diyas, had the aperture wide open and slow shutter speed but you need the tripod or keep very steady.
LikeLike
nice photos 😀 I like the bumper cars photos.
LikeLike
These trailling lights are due to the Yashvin has been using a point and shoot. Moreover, in low light condition cameras shutter takes more time to close. That makes the trailling motion. 😛
LikeLike
@Guru :
Sorry, but you are absolutely wrong!
Did you mean that I used a simple point and shoot camera to take out those shots?
Moreover, in low light condition cameras shutter takes more time to close.
So, your camera automatically makes your shutter take more time to be closed?
Completely b***sh*t!
LikeLike
@ Guru – yeah thats not completely true. Trail lights are due to LOW SHUTTER SPEEDS. Irrespective of the camera you use actually. You can have the same output with a point and shoot or a DSLR. Its more specifically referred to as a LONG EXPOSURE.
Long exposures are used to create several effects, one of which is the trail lights.
Its not really precise to say that in low light conditions the shutter takes more time to close. It might in AUTO mode. So in this mode the camera compensates by reducing shutter speed to provide an optimum exposure. BUT this is not always the case.
On some cameras u have the possibility to chose ur own shutter speeds/ aperture/iso speed (Specially DSLRs) More over, in low light, good exposure can be obtained by boosting the ISO or reducing the aperture which implies no need to reduce shutter speed.
LikeLike
they are really nice indeed…not bad for a first time
LikeLike
On PnS cameras the shutter speed cannot be set. Unless you have a semi manual(I have a friend using a Panasonic). Unlike those, on the DSLR you can fully manipulate your own functions(Aperture, shutter speed, ISO, EXP, flash compensation or more). Doorgesh is right. Now you can try some more materials to get better shots… Or some experimentation, creativity and imagination.
By the way Yashvin, what camera are you using?
LikeLike
@Doorgesh : Thanks for the professional point of view 🙂
@Neel : Nicely said.
I am using a Fujifilm S5200.
Once I complete the learning phase, I will more to a more nicer one, but for now, the mode settings knob remains on “L” – Learning lol!
Thnks for ur comment, keep visiting 😉
@Guru : Your comment is still confusing me, are you sure abt what you said or perhaps you expressed yourself wrongly?
LikeLike
@ Neel – Its not completely true, i had a point and shoot camera where u could set the shutter speed. Of course it depends on the models. Mine was an Olympus C500 Zoom. you can google it up to find more info. But most point and shoot do offer some kind of manual override. For instance, ive noticed that on most u can change ur iso speed. on some u can even set different focusing ranges.
@Yashvin – Its always a pleasure to share 🙂
LikeLike
wowwwwwwww..so beautiful! Amen mwa popom laba 1 night dou 😛 coz I think I’m small enough to get inside the “auto tamponneuse” tvr
But 1 important thing … you have not yet tried your camera on me grrrrrrrrrr lol
LikeLike
Dhaneesha said:
But 1 important thing … you have not yet tried your camera on me grrrrrrrrrr lol
No comments…
Nice pics Yashvin.. Your pics will AUTOMATICALLY be better with time.
Btw.. for complete manual control of the camera, you can set autofocus off [top left knob] and using M mode. Also use Timer for your shots and since this camera does not have a remote control, choose a timer of 5-10 seconds..
Also GREAT photographers may use a “point and shoot” camera to produce GREAT photos.. Many pros says so…
check this out
B.
LikeLike
And definitely… if you start checking flickr regularly, you’ll get very inspired…
LikeLike
@ Doorgesh – I agree since my sister has focusing settings on her Nokia mobile phone. LOL! It won’t surprise at all seeing a DSLR phone! Hahaha! Yeah that’s true. The ISO and focusing range can be set. As for the shutter speed and aperture I didn’t know.
LikeLike
Good attempt Yashvin 🙂 but the first four pictures could have been better if you increased your aperture, what happens now is the lights are overexposed and the background is underexposed… resulting in a lack of detail and annoyingly bright spots.
The opposite applies to the ones you taken in the city, a smaller aperture would make the images sharper yet keeping the blur car lights movement effect.
If you are using a point to shoot camera, try to shoot 3 pictures with different exposure and merge them in photoshop, it will create a single correctly exposed shot.
These pictures reminds me the first time I played with a camera ^^ good old times.
Way to go 🙂 am sure you’ll be taking great shots soon.
LikeLike
Nice shots. Specially the long exposures. In the gallery, I like the 1st and 4th pics best. Those long lights in the water are cool!
What were you shooting with? A DSLR? If so, what make and model?
Photography is fun!
LikeLike
@Inf : Hi, thanks for ur comment.
I am using a Fujifilm S5600.
@James : wow, nice advices 🙂 Thnks!
@Ritesh : 😉
LikeLike
A nice set of pictures, especially considering they are your first attempt
LikeLike
Top net. Keep it up.
LikeLike
These are very nice shots. Can you try shooting the milky way for me? I want to see what it looks like from mauritius. I am shooting my new yearly timelapse with the 5Dmk3 and i will drop by mauritius end of year so if you could do that, it would be great!
Tip: try using a graded ND (Neutral Density) or variable ND filter on the sea at night so the sea smoothes out and will look surreal and milky.
LikeLike
I wont promise anything but I will try.
So far, I have only been to Milky Lane (an ice cream shop) and I can say that it’s a wonderful experience. Hope that Milky Way won’t deceive me :PCya!
LikeLike